
Container Rose Care System Setup
Container rose care system setup starts with creating stable planting conditions for the container rose before long-term care begins. A successful setup outcome depends on how the pot, roots, and soil work together during planting so the rose can settle without avoidable stress. Pot readiness, drainage, planting depth, and first watering are the main conditions that influence the initial setup.
A container rose care system includes the container rose, a prepared planting container, a suitable soil mix, and the basic planting conditions needed for root support and early stability. The setup connects pot condition, root condition, soil placement, and watering start into a single planting process rather than treating them as separate tasks. Detailed pot sizing, soil requirements, watering routines, and long-term maintenance belong to connected topics within the Container Rose Care System hub.
Many setup problems can begin with preventable mistakes such as blocked drainage, incorrect planting depth, poor soil placement, or an unsuitable first watering approach. These conditions may contribute to waterlogging, buried crown issues, weak soil settlement, or reduced early stability depending on the rose form and container setup. Checking these factors before and during planting helps create a more reliable foundation for the requirements that follow.
Setup Requirements Before Planting Container Roses
Your setup requirements are ready only when the pot, drainage path, soil, tools, and rose condition have been checked before planting begins. Setup readiness depends on pot depth, drainage holes, root condition, and handling preparation rather than the presence of supplies alone. Use the checklist below to verify readiness before planting container roses.
Skipping readiness checks can lead to drainage, planting depth, and handling errors that may affect the planting setup. Readiness can differ by rose form, so bare-root roses and nursery-potted roses should be checked according to their root condition before planting starts.
- Pot depth: Verify that pot depth provides root room appropriate for the rose form and root size; limited root room can make planting depth and setup readiness harder to maintain.
- Drainage holes: Confirm that drainage holes are open and unobstructed; blocked holes can increase the risk of poor drainage during setup.
- Drainage mesh: Check that drainage mesh allows free water exit while helping reduce the risk of blocked holes after soil placement.
- Rose soil mix: Verify that the rose soil mix supports root contact and stable soil placement; unsuitable conditions can complicate planting depth control.
- Gloves: Keep gloves available when handling container roses; handling readiness improves when roots and stems can be positioned with better control.
- Trowel: Have a trowel or similar hand tool ready for soil placement; limited soil control can reduce planting accuracy.
- Watering can: Prepare a watering can for first watering after planting; controlled watering can help reveal whether drainage is functioning as expected.
- Rose form and root condition: For a bare-root rose, verify that root condition allows planting without excessive drying or damage; readiness depends on the condition of the exposed roots.
- Nursery-potted rose readiness: For a nursery-potted rose, check root condition and root ball stability; readiness depends on whether the root system can be planted with minimal disturbance.
This checklist chart outlines the essential setup requirements to verify before planting container roses, covering physical checks, supplies, and rose condition.

Pot depth, drainage, soil, and tool readiness
The physical setup is ready when the container, drainage path, soil, and tools can support planting without correction. Use the checklist below to verify pot, drainage, soil, and handling readiness before placing the rose in the container.
- Pot depth: Confirm that pot depth can accommodate the rose type and root size; inadequate planting fit can make root placement and early stability more difficult.
- Drainage holes: Check that drainage holes are open and unobstructed; clear water exit helps reduce drainage-related setup problems.
- Saucer: Verify that a saucer, if used, does not restrict the drainage path; retained water may interfere with drainage after watering.
- Drainage mesh: Confirm that drainage mesh allows water exit while helping reduce the risk of blocked drainage holes.
- Soil mix: Check that the soil mix has a loose texture that supports root contact and soil settlement around the root area during planting.
- Trowel, gloves, and watering can: Keep these planting tools ready for soil placement, handling readiness, and first watering; missing tools can slow planting and make adjustments less controlled.
- Stop signal: Do not proceed if pot depth does not suit the root size or if drainage holes and drainage mesh cannot provide a clear drainage path. If container fit remains uncertain, select the right pot before continuing.
Rose form and root condition before setup
Rose form and root condition determine how the rose should be handled during setup before placement in the container. Inspect the plant first to confirm handling readiness, then separate checks between bare-root and nursery-potted roses.
- Bare-root rose — root moisture: Check that root moisture is present and that the root system is not excessively dry; dry roots may affect handling readiness during placement.
- Bare-root rose — damaged roots and stem condition: Inspect for damaged roots and review stem condition before handling; broken roots or weakened stems may require extra care during setup.
- Bare-root rose — visible stress: Check for visible stress before placement; if stress appears severe, setup may need to be paused for corrective care before continuing.
- Nursery-potted rose — root ball firmness: Confirm that the root ball remains reasonably firm during removal from its container; a loose root ball can make placement more difficult.
- Nursery-potted rose — graft union visibility: Check that the graft union can be identified when present; visibility helps maintain planting-depth awareness during setup.
- Nursery-potted rose — plant condition: Review root condition, stem condition, and visible stress before handling; if roots are dry, broken, or the plant appears severely stressed, pause setup and assess whether corrective care is needed before installation continues.
Preparing the Rose Container for Planting
The rose container must be prepared so water can leave the pot and roots can sit at a workable planting height. This preparation reduces the chance of blocked drainage, poor root support, or unstable placement before the rose is added. Follow these steps to prepare the container before planting.

Drainage preparation should protect drainage openings without blocking the drainage path. A base layer can support setup only when it preserves free water exit, so base-layer choices should remain conditional on the rose container, saucer clearance, and planting bed height.
- Check the drainage openings: Confirm that each opening is clear before adding material; blocked drainage can hold water at the pot base and affect root placement conditions.
- Place drainage mesh carefully: Set drainage mesh over the openings without pressing it tightly into the holes; mesh placement should keep soil from blocking the path while allowing water to exit.
- Decide on the base layer: Use a base layer only when it does not compact, block the drainage openings, or raise the planting bed height too much; for deeper detail, prepare soil and drainage before continuing.
- Add the initial soil layer: Build a loose soil bed that supports root placement at the intended height; a low or uneven soil bed can make planting depth harder to control.
- Test container stability: Check that the rose planter sits steady on its surface, especially for a balcony pot, outdoor pot, or pot used with a saucer; unstable placement can shift the rose during filling and watering.
- Recheck planting bed height: Set the initial soil layer so the roots can sit naturally before backfilling; if the rose sits too high or too low, adjust the soil bed before planting continues.
Drainage opening protection and base preparation
Drainage opening protection should keep soil in while letting water out through the pot base. The goal is to preserve free water exit without restricting the water path, so focus on drainage mesh placement and water exit during setup.
- Place drainage mesh over each drainage opening: Position the drainage mesh so it provides hole coverage while allowing free water exit; check that the drainage hole remains open beneath the mesh layer.
- Protect openings without sealing them: Drainage opening protection helps retain soil, but covering openings too tightly may reduce water exit and interfere with the drainage path.
- Check saucer clearance: If a saucer is used, confirm that water can leave the drainage opening without remaining pooled against the pot base; adequate saucer clearance can help preserve the drainage path.
- Inspect for compaction risk: Check that material around the drainage mesh is not compressed against the drainage opening; compacted material may contribute to a blocked hole and reduced water movement.
Initial soil layer and planting bed preparation
The initial soil layer controls planting height and root support before the rose is positioned. A loose planting bed should support root spread, allow for settling allowance, and leave room for height adjustment during test placement.
- Set the soil depth by test placement: Add enough soil to create a workable planting bed, then place the rose briefly to check whether the planting height looks too high or too low.
- Keep a loose texture: Shape the soil bed lightly without pressing it into a compacted base; loose texture helps the roots make contact while leaving room for settlement.
- Support root spread: For exposed roots, shape the planting bed so the root spread can rest naturally; for a root ball, keep the surface even enough to support stable placement.
- Allow for settling: Leave a settling allowance because first watering can lower the surface level; avoid filling the container to its final look before the rose is checked in position.
- Adjust if the rose sits high or low: If the rose sits high during test placement, remove or flatten part of the soil bed; if the rose sits low, add more initial soil layer before continuing.
Positioning the Rose in the Container
Positioning starts by centering the rose and supporting it before planting depth is finalized. Correct positioning depends on plant alignment, root shape, and stability, with handling differences between a bare-root rose and a potted transplant.
If roots spread outward, the handling method differs from a root ball that holds its shape. Root spread, root ball level, and graft union visibility should be checked before moving to backfilling, as shown in the steps below.
Use this visual reference to confirm centering, root arrangement, and stem alignment before adding more soil.

- Place the rose on the container centerline: Position the rose near the container centerline and check that stem orientation appears upright before continuing.
- Position a bare-root rose by root spread: Arrange the root spread over the planting bed so the roots fan outward naturally; check that roots are not folded, twisted, or crowded against the container wall.
- Position a potted transplant by root ball level: Set the root ball onto the planting bed and check that the root ball level appears even without leaning or shifting.
- Confirm graft union visibility: When a graft union is present, keep graft union visibility clear during positioning so crown position can be reviewed during the final planting-depth check.
- Check stem orientation and alignment: Adjust plant alignment if stems lean noticeably to one side; check that the rose appears stable when viewed from multiple angles.
- Verify positioning before backfilling: Recheck the container centerline, root spread or root ball level, and overall stability before adding more soil. Positioning is complete when the rose remains supported and ready for final planting-depth checks.
Bare-root rose positioning after soaking
A bare-root rose should be placed with hydrated roots spread over mound support before backfilling begins. Soaked roots can be arranged more naturally during placement, and the final positioning should include a graft union visibility check.
- Confirm soaking readiness: Position the bare-root rose only after the soaked roots appear hydrated and flexible enough for placement over the planting bed.
- Use root trimming only when needed: If broken roots, dry roots, or crowded roots interfere with placement, perform root trimming only as necessary before continuing.
- Create a root fan over mound support: Place the bare-root rose on the support mound and spread the root fan outward so the roots rest naturally around the mound.
- Check graft union visibility: Adjust placement so the graft union remains visible during positioning and can be reviewed again during the final planting-depth check.
- Caution before backfilling: If broken roots, dry roots, or crowded roots are still affecting root spread, correct the placement issue before backfilling to help maintain an even root arrangement.
Potted rose transplant positioning
A potted rose transplant should keep its root ball stable while being set at the right planting height. Handle the root ball according to its firmness and root ball moisture, then complete a circling-roots inspection before placement.
- Remove the potted rose transplant carefully: Support the root ball during removal from the nursery container; the root ball should remain firm enough to hold its shape during handling.
- Inspect root ball moisture and condition: Check whether root ball moisture supports stable handling and placement; a loose or very dry root mass may require more careful positioning.
- Check for circling roots: If circling roots are visible around the outer root ball, use gentle loosening only where the roots are restricting soil contact during placement.
- Edge case for compacted root balls: If the root ball appears densely compacted and circling roots limit placement, loosen only the affected outer area enough to improve root ball placement and soil contact.
- Set planting height and container centering: Position the root ball so the root ball top can be checked against the intended final level, then confirm container centering and even soil contact before backfilling.
Planting Depth for Container Roses
Planting depth for container roses should keep the roots covered while avoiding unsafe burial of the root crown or graft union where those areas are relevant. The correct planting level depends on rose form, root structure, grafted or own-root status, climate context, and expected container settling.

The visible depth references are the root crown, graft union, root ball top, and final soil level. For a potted transplant, the root ball top helps show where the existing soil line meets the new container soil. Leave room for mulch allowance and watering settlement so the settled level does not expose roots or cover sensitive crown areas unexpectedly.
Planting too deep can hide the crown area or graft area where visibility matters, while planting too high can leave roots or the root ball edge exposed after watering settlement. Before final backfilling, check whether the rose form, root crown, graft union, root ball top, and final soil level still align with the intended planting level.
| Rose form | Depth check before backfilling |
|---|---|
| Bare-root rose | Keep the root spread covered while checking root crown and graft union visibility where relevant. |
| Potted transplant | Use the root ball top and existing soil line to guide the final soil level before settlement. |
Filling, Firming, and Stabilizing the Rose Planter
Filling and firming should remove air gaps without compacting the soil around the roots. The solution is staged backfilling that improves root-soil contact while helping preserve soil structure and drainage conditions.
Stabilizing is complete when the rose remains upright and the surrounding soil provides even root-soil contact. If stem alignment changes noticeably or the plant leans during filling, use that observation as the pre-watering correction signal before continuing.
- Add soil in stages: Use staged backfilling around the root area, check for uneven gaps, and add backfill where air pockets remain visible.
- Lightly firm each layer: Apply light firming to improve root-soil contact, check for compacting risk, and loosen the affected surface if the soil becomes overly firm.
- Inspect for air pockets: Check around the root zone for visible voids, confirm soil contact, and add soil where gaps remain.
- Verify stem alignment: Check that stem alignment remains upright, observe for leaning, and reposition the rose if alignment shifts before watering.
- Review soil settling and surface level: Check whether soil settling has lowered the surface level unevenly, then add a small amount of soil where correction is needed.
- Complete the final stability check: Confirm plant stability and root-soil contact, then perform one brief planting-depth review before watering begins.
This chart shows the sequential steps to fill, firm, and stabilize a rose planter, including backfilling, firming, and final verification checks to ensure proper root-soil contact and plant stability.

First Watering After Container Rose Setup
First watering should settle the soil and confirm drainage without leaving the container waterlogged. The watering amount depends on pot size, soil dryness, and how the container responds during container rose setup.
Soil settlement can occur after first watering as moisture improves root-soil contact and reveals small gaps around the root area. A drainage exit check helps confirm that excess water can leave the container, while saucer emptying helps reduce the risk of waterlogging. Use the steps below to complete the first watering process.
- Apply the initial watering: Add water gradually, observe how the soil absorbs moisture, and continue only until the soil appears evenly moistened.
- Check drainage exit: Watch for water leaving the drainage openings, confirm that excess water can exit, and inspect for blockage if no drainage exit is visible.
- Wait and inspect soil settlement: Allow the soil to settle briefly, observe whether the surface level has dropped, and add a small amount of soil if settling creates gaps or exposes roots.
- Complete saucer emptying: Check for collected water after drainage, empty the saucer when needed, and recheck that water is not remaining around the container base.
- Review post-watering stability: Confirm post-watering stability, check that the rose remains upright, and correct any leaning before moving to the next care stage.
If water runs through very quickly, soil dryness or incomplete soil contact may need a closer check. If pooled water remains after drainage, review drainage conditions before continuing with the first watering routine.
This chart shows the first watering process after container rose setup, including key steps and common issues to watch for.

Container Rose Setup Mistakes to Avoid
When blocked drainage, wrong planting depth, or poor root contact occurs during setup, preventable establishment problems can follow. Setup mistakes matter because they create drainage, depth, and root-contact conditions that are often easier to correct during planting than after setup is complete, as shown in the mistake pattern below.
The most common setup mistakes involve blocked drainage, wrong planting depth, and compacted soil. These conditions can contribute to saucer pooling, exposed roots, buried crown areas, or uneven root contact during early establishment. Review the correction for each condition before continuing.
- Blocked drainage: Risk: water may remain in the container and contribute to waterlogging. Correction: clear the drainage path and confirm drainage exit before proceeding.
- Wrong planting depth: Risk: exposed roots or buried crown areas can develop after soil settlement. Correction: adjust the planting level before completing backfilling.
- Compacted soil: Risk: reduced root contact quality and uneven air distribution around roots. Correction: loosen the affected soil and refill lightly.
- Dry roots: Risk: root placement and early establishment may be affected. Correction: address root moisture before continuing setup.
- Saucer pooling: Risk: standing water may remain around the container base. Correction: complete saucer emptying and recheck drainage conditions.
- Hard firming: Risk: excessive pressure can create compacted soil around the root zone. Correction: lightly firm the soil only enough to support stability.
- Skipped first-watering checks: Risk: soil settlement, hidden gaps, or leaning may go unnoticed. Correction: complete first-watering checks and correct any visible issues before finishing setup.
If dry roots, hard firming, or skipped first-watering checks are discovered during setup, pause and correct the condition before continuing. A visible setup issue is often the clearest signal that the container should be reviewed before more soil or water is added.
Correction priorities should focus on restoring drainage, correcting planting depth, and improving root contact before final stabilization. These setup-specific corrections can help reduce avoidable problems during early establishment without expanding into broader troubleshooting.
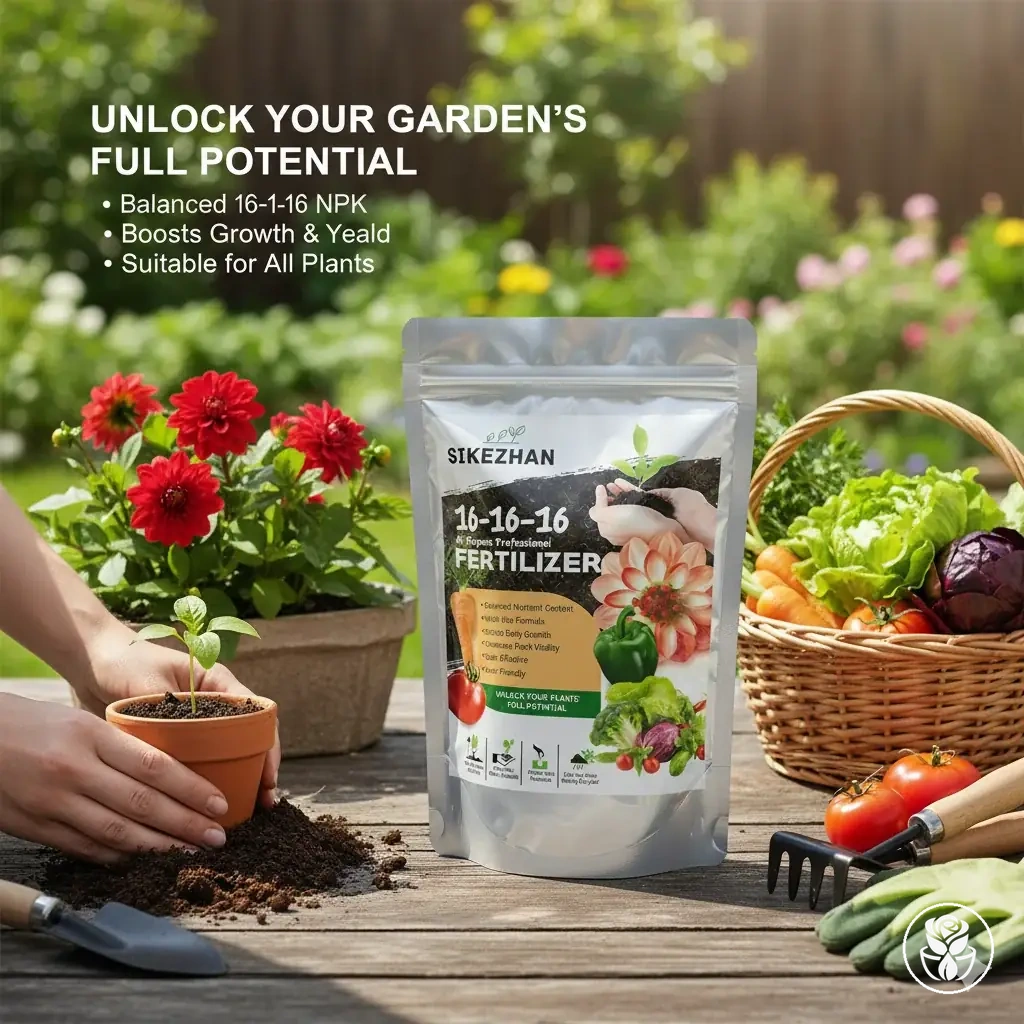
The products below are useful examples for comparing available options. Before buying, check that the compatibility criteria, key features, and product details match your needs.


This chart shows the three most common setup mistakes for container roses and the recommended correction for each.

After-Setup Checks for Early Container Rose Care
After-setup checks confirm whether the rose remains stable after planting and watering. These checks connect installation quality to early container rose care and help identify conditions that may need attention before routine maintenance begins, as outlined in the checklist below.
- Soil settling: Observe whether the soil surface has dropped or exposed roots after watering; act by adding soil and rechecking the planting level when settling creates visible gaps.
- Stem stability: Observe whether the rose remains upright without shifting; act by correcting support and alignment when leaning becomes noticeable.
- Drainage behavior: Observe whether excess water can leave the container and whether water remains around the base; act when drainage appears restricted or standing water persists.
- Moisture check: Observe whether the soil remains excessively dry or unusually wet after setup; act by adjusting watering only when moisture observation suggests a need for correction.
- Sunlight exposure: Observe whether the rose is positioned for its intended sunlight exposure without obvious stress signs; act if placement conditions appear unsuitable after setup.
- First-week observation: Observe for changes in stability, moisture conditions, and general plant response during the first week; act when visible setup-related issues continue after correction.
When soil settling affects the planting level or stem stability changes after watering, a recheck can help prevent small setup issues from becoming larger maintenance concerns. Correct the visible condition first, then confirm that the container remains stable before moving on.
If drainage behavior appears unusual or a moisture check suggests excessively wet or dry conditions, continue observing before making major care changes. Any correction should match the condition observed and remain focused on early care needs after setup.
Sunlight exposure readiness depends on whether the rose can remain in its intended location without immediate signs of placement-related stress. First-week observation helps confirm that setup conditions remain consistent, but watering, feeding, pruning, and seasonal care should follow separate schedules after setup stabilizes.
The next-step criteria are simple: the rose should remain stable, the soil level should remain appropriate, and drainage behavior should appear normal for the container. Once these after-setup checks are complete, transition to the ongoing maintenance plan for continued care timing and observation.
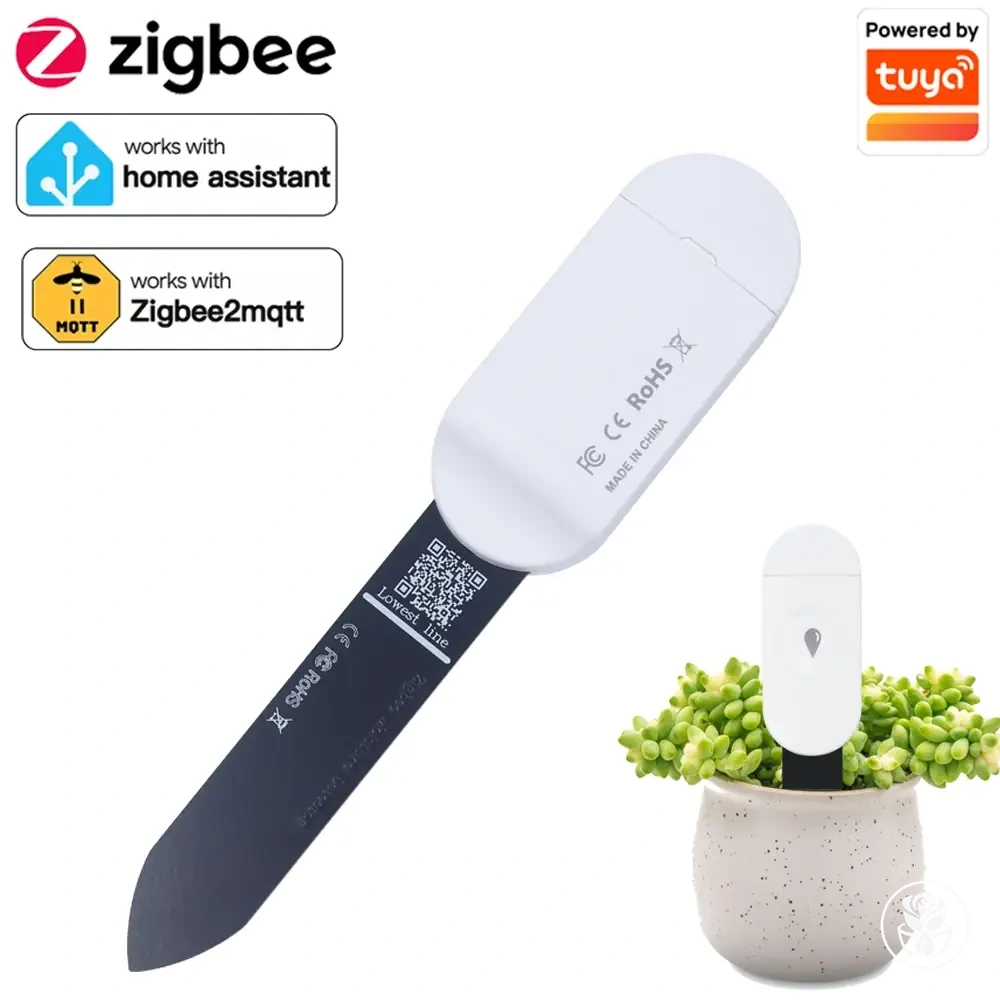
The products below are useful examples for comparing available options. Before buying, check that the compatibility criteria, key features, and product details match your needs.
This chart shows the key after-setup checks for container roses, including stability, moisture, and placement observations, and the actions to take when issues are detected.
