
Container Rose Watering Routine Without Overwatering
A container rose watering routine starts with checking soil moisture, not following a fixed calendar. Water only when the potted rose shows the root zone is ready for moisture, because overwatering can keep the pot too wet and reduce root-zone oxygen.
Container rose watering is a moisture-managed routine that connects the pot, soil moisture, drainage, watering frequency, and saucer behavior into one decision. The goal is to hydrate the root zone without leaving wet soil or standing saucer water after watering. This watering routine is not a full soil setup or disease-treatment plan; those wider setup decisions belong in the Container Rose Care System guide.
The safer sequence is to check moisture first, use deep watering at the soil surface when the pot needs it, adjust watering frequency by heat, season, exposure, and pot size, then watch how drainage and the saucer behave afterward. If water runs through too quickly, sits in the saucer, or the pot stays wet, the next watering decision should change. The first step is understanding how container roses use and lose water in pots.
How Container Roses Use and Lose Water in Pots
How container roses use and lose water in pots is a balance between moisture movement into the root zone and moisture loss from the container. Container roses absorb water through their roots while potted roses lose moisture through evaporation from the soil surface and transpiration from leaves. This balance can create fast-drying pots in some conditions while still allowing trapped water to remain deeper in the root zone.
Pot volume affects how much moisture reserve a container can hold and how quickly that reserve changes. Soil porosity influences water movement through the root zone, while drainage openings help excess moisture leave the container. Heat and exposure can increase evaporation, and active growth can increase transpiration, which may increase drying speed. At the same time, trapped water can remain around roots when drainage openings do not release excess moisture efficiently. Maintaining root oxygen is the key condition that helps balance moisture retention and drainage.
How Container Roses Use and Lose Water in Pots becomes easier to understand when moisture movement and trapped moisture are viewed together. The image below shows where moisture may dry, drain, or remain around the root zone.

Soil and drainage can influence watering decisions, but they are not the main subject of this section. For more detail on those influence factors, see soil and drainage basics.
Check Moisture Before Watering a Potted Rose
A potted rose should be watered when the root-zone moisture is drying rather than when the root zone remains wet. Moisture needs can change with season, exposure, and container conditions, so a moisture check should guide the watering decision.
Check Moisture Before Watering a Potted Rose by looking beyond the soil surface. A dry soil surface does not always mean the root zone needs water, while damp conditions below the surface may indicate an overwatering risk. A finger test, pot weight check, and observation of drainage behavior can help assess water need more accurately. Recent weather and plant signals can provide additional context before watering. The checklist below helps connect those observations to a watering decision.
Check Moisture Before Watering a Potted Rose by verifying where moisture remains before adding water. The image shows where to inspect moisture conditions before deciding whether the potted rose needs water.

- If the soil surface is dry but root-zone moisture still feels damp, wait and check again later before watering.
- If the finger test suggests slight dryness below the surface and the pot weight feels moderately light, water lightly and reassess conditions afterward.
- If root-zone moisture feels low, the container weight feels noticeably lighter, and recent weather has increased moisture loss, soaking deeply may be appropriate.
- If drainage behavior suggests wet soil remains for extended periods, delay watering and observe conditions before adding more water.
- If plant signals such as mild leaf droop appear alongside dry soil, confirm moisture conditions before making a watering decision.
- If a moisture meter reading is used, compare it with a finger test rather than relying on a single reading alone.
If the root zone still contains moisture, waiting may be the better option. If moisture is declining but not fully depleted, watering lightly may help maintain balance. If multiple criteria indicate a stronger water need, soaking deeply may be appropriate depending on current conditions.
Surface Dryness Versus Root-Zone Moisture
Surface dryness alone is not enough to trigger watering. Dry surface soil can appear while root-zone moisture remains available below the soil surface. A watering decision should be based on conditions in the root zone rather than the appearance of the top layer.
This distinction helps prevent watering based only on visual dryness. Surface crusting can make dry surface soil appear more severe than conditions deeper in the pot, while finger-depth testing may reveal damp soil below the surface. In other cases, stale wetness may remain in the lower pot even when the top layer looks dry. Confirming root-zone moisture provides the next local cue for a watering decision.
| Dry-Looking Surface Soil | Genuinely Dry Root-Zone Conditions |
|---|---|
| Surface dryness is limited to the top layer. | Root-zone moisture is declining through the root area. |
| Finger-depth testing may find damp soil below the surface. | Finger-depth testing may find little remaining damp soil. |
| Moisture below the surface may still support the plant. | Moisture below the surface may be limited. |
| Immediate watering may not be necessary. | Watering may be appropriate if other indicators support the decision. |
| Stale wetness can sometimes remain in the lower pot. | Lower-pot moisture is no longer providing adequate root-zone moisture. |
Leaf Droop, Dry Soil, and Other Water-Need Signals
Water-need signals should be confirmed with soil moisture before watering. Leaf droop, dry soil, and light pot weight can suggest that a potted rose may need water, but plant signals are clues rather than proof.
When leaf droop appears during hot conditions and the soil also seems dry, the rose may be approaching a watering need. A light pot weight can strengthen that signal when checked alongside soil moisture. If wilted leaves improve after shade recovery, the droop may be related to heat wilting rather than immediate water shortage. Temporary droop during heat can occur even when deeper soil is not fully dry, so caution is appropriate before making a watering decision.
Leaf Droop, Dry Soil, and Other Water-Need Signals separate observations from decisions by pairing each symptom with a confirming check.
- If leaf droop appears, check soil moisture before treating the symptom as a water need.
- If dry soil is visible, confirm whether moisture remains below the surface before watering.
- If a light pot weight is noticed, compare it with soil moisture conditions to support the watering decision.
- If heat wilting occurs during strong sun or heat exposure, look for shade recovery before adding water.
- If plant signals appear together with dry soil and a light pot weight, watering may be appropriate after confirmation.
This chart shows how to interpret water-need signals in potted roses by pairing each symptom with a confirming check.

Water Container Roses Slowly and Deeply at the Base
Container roses should be watered slowly at the base until the root zone is evenly moistened. Deep watering helps moisture move through the soil surface and into the root zone rather than remaining near the top layer. Runoff is the practical stop signal that indicates the watering pass is nearing completion.
Fast pouring can create runoff before the soil has enough time for absorption, while shallow splashing may leave wet leaves and a missed root zone. Slow watering encourages more even root-zone wetting throughout the container. Water at the base keeps the focus on the soil surface where roots receive moisture. The steps below demonstrate the watering sequence.
When runoff appears too quickly, pause the watering pass and allow time for absorption. A brief pause may help a dry container accept moisture more evenly during the next slow soak. Resume slow watering and observe how the soil responds before continuing. Results can vary by container and moisture conditions, so adjustments may be needed.
Water Container Roses Slowly and Deeply at the Base by following the sequence below. The image demonstrates where and how to apply water for effective root-zone wetting.

- Apply water at the base onto the soil surface and observe whether the container accepts moisture or sheds it immediately; continue if absorption begins.
- Use slow watering and watch for moisture moving into the root zone; continue while the soil remains receptive.
- If runoff appears quickly, pause and allow absorption before deciding whether to continue the watering pass.
- Resume the slow soak and observe whether root-zone wetting becomes more even; continue if moisture is entering the soil.
- Check the drainage area for runoff and continue only while the container is still accepting water.
- Stop when drainage runoff is established and before saucer water begins accumulating, as standing saucer water may increase overwatering risk.
Caution: Repeated shallow splashing can wet leaves while leaving much of the root zone under-watered, so water at the base rather than relying on light surface splashes.
How Much Water to Apply Per Watering Session
The right water amount for a watering session is enough to achieve root-zone wetting without leaving the pot sitting in water. Water amount should match current container conditions rather than a fixed quantity. Pot size, soil dryness, runoff timing, and plant maturity all influence the amount to apply.
When a small dry pot needs water, a deeper soak may be appropriate to reach the root zone. A large damp pot may need only a smaller top-up or no additional water yet. During hot weather, moisture can be used more quickly, which may increase the need for a deeper soak when soil dryness is confirmed. How Much Water to Apply Per Watering Session depends on the conditions summarized in the table below.
| Condition | Attribute to Check | Water Amount Decision |
|---|---|---|
| Small pot | High soil dryness | A deeper soak may be appropriate until root-zone wetting is achieved and runoff timing suggests moisture is moving through the container. |
| Large pot | Moisture still present | A smaller top-up may be sufficient if additional root-zone wetting is needed. |
| Mature plant | Higher moisture use | The water amount may need to be greater than for a less-established plant. |
| Hot weather | Faster drying conditions | A deeper soak may be appropriate when soil dryness and runoff timing support the decision. |
| Early runoff | Limited absorption | Pause, allow absorption, and reassess the amount to apply before continuing. |
| Saucer water remains | Drainage stop signal | Reduce the watering dose and avoid adding more water until excess moisture has cleared. |
These examples illustrate condition-based decisions rather than fixed rules. The safer approach is to match water volume to root-zone wetting, runoff timing, pot size, and current growing conditions.
Drainage Runoff After Deep Watering
Drainage runoff after deep watering is useful only when interpreted with soil absorption and drainage behavior. Water draining out of a container is not automatically a sign that the wet root zone has been reached or that watering was ineffective. The main interpretation cue is how drainage runoff relates to soil absorption during and after deep watering.
Early runoff can occur when a hydrophobic mix sheds water before enough moisture enters the soil. Steady runoff after continued soil absorption may indicate that root-zone wetting has progressed through the container. Blocked drainage can change the runoff signal because water may not leave the pot normally even when lower soil remains wet. Saucer water should be interpreted alongside drainage behavior, especially when water left in the tray remains after watering. Persistent poor runoff should be treated as a drainage issue rather than only a watering-frequency issue.
Drainage Runoff After Deep Watering can be interpreted using the checklist below.
- If early runoff appears from a dry hydrophobic mix, interpret it as limited soil absorption and check whether a pause helps the soil rewet more evenly.
- If steady runoff follows continued deep watering, interpret it as a runoff signal that moisture has moved through the container and check whether the wet root zone appears adequately reached.
- If blocked drainage is suspected, interpret the runoff pattern cautiously and check whether water is leaving the drainage area normally.
- If saucer water remains after watering, interpret it as water left in the tray rather than proof of proper root-zone wetting and check whether it clears within normal drying conditions.
- If drainage runoff remains inconsistent across repeated watering sessions, interpret the pattern in relation to drainage behavior and check whether a broader drainage problem may be present.
This chart shows the main runoff scenarios after deep watering and the recommended checks to interpret soil moisture and drainage behavior.

Adjust Watering Frequency by Season, Heat, and Exposure
Watering frequency changes with season, heat, wind, and exposure because each condition changes how quickly a container rose loses moisture. A potted rose in a hot, exposed position may dry faster than one in sheltered placement. Use moisture checks and pot drying speed instead of a fixed schedule.
During hot spells, sun exposure and warm air can increase pot drying speed, so the watering interval may need to shorten when soil moisture confirms the need. Wind and balcony exposure can also increase evaporation around the container. Rainfall may reduce watering need when the pot receives enough moisture, while sheltered placement may keep the pot drier if rain does not reach the soil surface. In cooler periods or dormancy, water use may slow, so restraint becomes part of the seasonal routine. These exposure patterns are easier to judge when matched with sunlight and placement.
Adjust Watering Frequency by Season, Heat, and Exposure by turning observations into a care rhythm. Check soil moisture, note the drying rate, then adjust the next watering interval based on whether the pot is drying faster or slower than before. This keeps the watering schedule responsive without turning it into a fixed weekly rule. For a broader seasonal rhythm, connect these checks to the full care schedule.
| Condition | Moisture Change | Schedule Adjustment |
|---|---|---|
| Summer heat | Pot drying speed may increase | Check moisture more often and water only when the root zone is drying. |
| Strong sun exposure | Soil surface and container may dry faster | Shorten the interval only if soil moisture confirms water need. |
| Wind or balcony exposure | Evaporation may increase around the pot | Use a moisture check before increasing watering frequency. |
| Rainfall | The pot may receive extra moisture | Delay watering if the root zone remains damp after rain. |
| Sheltered placement | Rain may not reach the pot evenly | Check the soil directly before assuming rainfall was enough. |
| Winter dormancy | Cool soil and slower growth may reduce water use | Extend the interval when moisture remains present and avoid unnecessary watering. |
Summer Watering for Fast-Drying Containers
Summer watering often requires more frequent checking because fast-drying containers can lose moisture quickly during warm conditions. Summer heat may shorten the watering interval, but soil moisture should still control the decision rather than automatic daily soaking. The safest adjustment is to increase observation and confirm soil moisture before watering.
Morning watering can help address moisture loss before evaporation increases later in the day. Hot wind on exposed pots and windy balconies may increase dry-out speed, especially in small pots with limited moisture reserves. An afternoon recheck may be useful when summer conditions are unusually warm and soil moisture appears to be declining quickly. Temporary midday droop in heat-stressed foliage should not automatically trigger repeated soaking if shade recovery or remaining soil moisture suggests another cause.
Summer Watering for Fast-Drying Containers uses the checks below to organize hot-weather watering adjustments.
- If summer heat increases evaporation, check soil moisture more often and adjust the watering interval only when the root zone is drying.
- If morning watering has already provided adequate moisture, use an afternoon recheck to confirm conditions before adding more water.
- If small pots are drying quickly, monitor pot drying speed closely and base watering decisions on confirmed soil moisture.
- If windy balconies increase moisture loss, use a moisture check before shortening the watering schedule.
- If heat-stressed foliage appears during the hottest part of the day, check soil moisture and look for temporary droop recovery before watering again.
This chart shows the key checks and adjustments for watering fast-drying containers during summer heat, including moisture-based decisions, environmental monitoring, and handling temporary foliage droop.

Winter Watering for Dormant Container Roses
Winter watering for dormant container roses is usually less frequent because dormant roses use water more slowly. Cool soil and reduced leaf activity can keep moisture available longer than during active growth. The routine should shift from regular watering to moisture monitoring.
Cool soil can slow drying, and long wet periods may increase overwatering risk if more water is added too soon. Rainfall may supply enough moisture when the pot is exposed, while sheltered pots or a covered balcony may stay drier if rain does not reach the soil. Frost risk also supports restraint because cold, wet containers may stay saturated for longer. Dry winter winds can still dry containers, especially in exposed or sheltered edge conditions. Water only when the root zone is drying and the container condition supports restrained watering.
Prevent Overwatering in the Pot and Saucer
When the pot or saucer stays wet after repeated watering, overwatering is often the likely cause. Preventing overwatering starts with stopping repeated watering while wet soil or standing water remains. Excess water can limit root oxygen and keep the root zone saturated for longer than necessary.
Wet soil that remains damp for extended periods may indicate that the container is receiving more water than it can use or drain. Standing water in the pot and saucer can increase the risk of a wet root zone, especially when poor runoff slows moisture removal. Yellowing and limp growth should be interpreted within the moisture context rather than as proof of a single cause. A sour smell may suggest that excess moisture has persisted in the container environment. The safer next action is to reassess soil moisture, drainage behavior, and watering frequency before using the yellow leaves diagnosis.
- If wet soil remains after previous watering, the likely risk is reduced root oxygen; the safer next action is to delay watering and monitor moisture conditions.
- If standing water remains in the saucer, the likely risk is prolonged saturation; the safer next action is to remove excess saucer water and check drainage.
- If poor runoff occurs during watering, the likely risk is excess moisture retention; the safer next action is to observe drainage behavior before watering again.
- If yellowing appears alongside wet soil, the likely risk is moisture-related stress; the safer next action is to evaluate watering conditions before making changes.
- If limp growth develops while the root zone stays wet, the likely risk is reduced root oxygen; the safer next action is to allow the container to dry appropriately before adding more water.
- If a sour smell is present, the likely risk is prolonged excess moisture; the safer next action is to review drainage and watering practices.
Early overwatering correction focuses on restoring a balanced moisture level before more serious problems develop. Symptoms linked to excess water do not automatically mean advanced root damage is present. When moisture-related symptoms persist despite corrected watering practices, further evaluation may be needed. For conditions that may extend beyond early overwatering, see root rot symptoms.
This chart shows the main overwatering conditions, their risks, and the corrective actions to restore balanced moisture.

Yellowing, Drooping, and Wet-Soil Warning Signs
Yellowing, drooping, and wet-soil warning signs suggest overwatering only when they appear with wet soil or poor drainage. Visible symptoms alone do not confirm the cause. Check soil moisture and drainage before changing the watering routine.
Drooping can come from dryness or excess water, so the moisture context matters. A dry pot with limp leaves points to a different watering decision than a wet root zone with soft droop. Yellowing, leaf drop, or weak new growth should be read as warning signs only when wet soil or poor drainage is also present. Keep the diagnosis local and avoid treating every leaf symptom as the same watering problem.
Yellowing, Drooping, and Wet-Soil Warning Signs connect visible signs to moisture context.
- If yellowing appears with wet soil, check whether drainage is slow before adding more water.
- If soft droop appears while the root zone is wet, pause watering and reassess soil moisture.
- If persistently wet soil remains after watering, check drainage before treating the symptom as normal stress.
- If leaf drop appears with poor drainage, review the watering interval and avoid repeated watering.
- If weak new growth appears with a wet root zone, check whether excess moisture is limiting recovery.
Standing Water and Poor Runoff After Watering
When standing water remains after watering, the lower root zone can stay wet longer than intended. Water left in a saucer or tray can keep moisture around the lower part of the container after watering should be finished. The longer this condition persists, the greater the overwatering risk.
A saucer, tray, blocked holes, compacted mix, or slow drainage can contribute to poor runoff. Poor runoff increases risk because excess moisture may remain around the lower root zone instead of draining away. A drainage problem does not automatically indicate severe damage, but persistent wetness should prompt a closer check. As a simple corrective cue, empty the saucer after drainage has finished and check blocked holes before watering again.
Standing Water and Poor Runoff After Watering can be reviewed with the drainage-related checks below.
- If standing water remains in a saucer, the lower root zone may stay wet longer than necessary; check how long water remains in the tray.
- If water is left in a tray after runoff, the waterlogged base may remain exposed to excess moisture; empty the tray after drainage has finished.
- If blocked holes restrict drainage, poor runoff may develop; check whether water can leave the container freely.
- If compacted mix slows water movement, the lower root zone may remain wetter than expected; check whether drainage appears unusually slow.
- If slow drainage continues across multiple watering sessions, poor runoff may be contributing to overwatering risk; review pot condition before watering again.
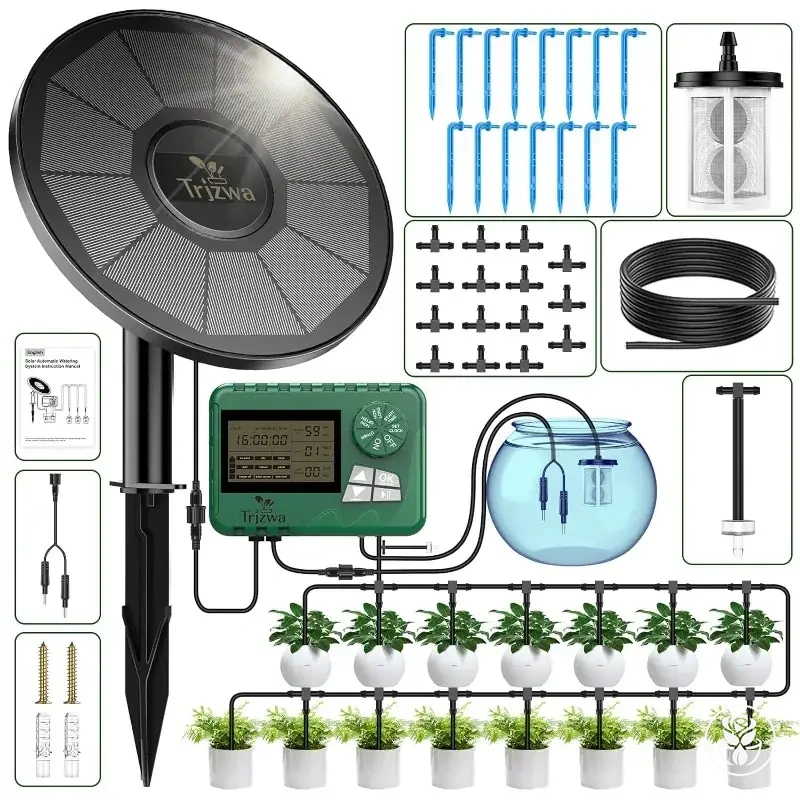
Use Drip Irrigation and Self-Watering Aids Safely
Watering tools can help only when paired with moisture checks. Drip irrigation, self-watering aids, and a moisture meter can support a container rose routine, but they do not replace moisture judgment. Safe use depends on monitoring the pot before and after the tool is used.
A watering can helps control where and how quickly water reaches the soil surface. Drip irrigation or a drip kit can control delivery through an emitter and timer, which may help when container exposure increases drying pressure. A moisture meter or soil moisture sensor can support a watering decision by adding a monitoring reference. Self-watering aids, including a reservoir or self-watering spike, can release moisture over time, but release speed and wet soil risk still depend on container conditions. Tool choice should match the watering problem, container exposure, and monitoring needs.
During travel, hot exposure, or uneven watering patterns, watering tools may help reduce routine gaps. Their usefulness depends on setup, reservoir behavior, and continued monitoring rather than automation alone. Use Drip Irrigation and Self-Watering Aids Safely by matching each tool to the watering challenge and the remaining risk.
- If uneven hand watering is the problem, a watering can controls application location and flow, but soil moisture should still be checked afterward.
- If hot container exposure increases drying speed, drip irrigation can control delivery timing, but changing weather may still alter moisture conditions.
- If short absences make watering inconsistent, self-watering aids and a reservoir can provide support, but wet soil risk depends on release speed.
- If moisture uncertainty affects the watering decision, a moisture meter or soil moisture sensor can support monitoring, but readings should be checked against visible soil conditions.
- If exposure changes during the season, watering tools can help consistency, but monitoring remains necessary because moisture use can change.
Watering tools are safest when they support a clear watering decision instead of replacing it. Drip irrigation, self-watering aids, a moisture meter, and a soil moisture sensor can each add control or monitoring, but every option has limits based on exposure, setup, and observation.
The products below are useful examples for comparing available options. Before buying, check that the compatibility criteria, key features, and product details match your needs.


This chart shows the key requirements, monitoring steps, and specific tool limits for safely using watering tools with container plants.

Drip Emitters and Timers for Potted Roses
Drip emitters and timers for potted roses can help when they deliver slow water matched to pot conditions. Drip irrigation is most useful when flow rate and timer duration are adjusted to the container rather than left unchanged. Observation remains necessary because moisture conditions can change between watering cycles.
Drip Emitters and Timers for Potted Roses should be checked with the settings below to verify safe watering control.
- If drip emitters use a flow rate suited to the pot size, slow watering may reach the root zone more evenly, but runoff observation is still needed.
- If emitter placement directs water toward the root zone, moisture distribution may improve, but uneven wetting can still occur in some containers.
- If timer duration matches current drying conditions, potted roses may receive steadier moisture, but conditions can change with weather.
- If seasonal adjustment follows heat or cooler conditions, the watering schedule may stay closer to plant needs, but a moisture check should guide schedule changes.
- If runoff appears too quickly during watering, reducing timer duration may help limit excess water application before the next observation.
Emitter placement, flow rate, timer duration, pot size, and runoff observation work together to influence watering outcomes. A larger pot may respond differently than a smaller container, so the same setting may not suit every situation. Seasonal adjustment can help align watering with changing conditions, especially when heat affects moisture use. When timer duration is changed, the reason should come from runoff observation or changing moisture conditions rather than a fixed formula, such as reducing duration when runoff appears too quickly.
Self-Watering Spikes and Reservoir Limits
Self-watering spikes and reservoir-style aids can reduce missed watering, but they cannot replace moisture checks for container roses. Self-watering aids may help support moisture availability between watering sessions, yet release speed and pot conditions can still create wet or dry soil problems. Safe use depends on balancing convenience with wet soil risk and under-watering risk.
Self-Watering Spikes and Reservoir Limits are easiest to understand through the safe-use limits below.
- If self-watering spikes release water too slowly during heat, container roses may dry faster than moisture is replaced, increasing under-watering risk.
- If reservoir size remains large relative to current moisture demand, soil may stay wet for longer, increasing wet soil risk when pot drainage is limited.
- If soil contact between the watering aid and potting mix is inconsistent, moisture distribution may become uneven, increasing dry-zone risk within the root area.
- If release speed remains high while pot drainage is slow, excess moisture may accumulate and increase overwatering risk.
- If monitoring frequency decreases after installing reservoir-style aids, moisture changes may go unnoticed until soil becomes too wet or too dry.
Reservoir size, soil contact, release speed, pot drainage, heat, and monitoring frequency all influence how self-watering aids behave. A reservoir that supports moisture during one period may keep soil wetter than intended when drying conditions change. Increased heat may alter how quickly moisture is used compared with how quickly a slow-release watering aid supplies it. Moisture checks remain necessary even when a self-watering aid is installed.